はじめに
今回はリアル調の水表現を作成してみました。

環境
Unity 2022.3.4f1
URP14.0.8
水を作ってみる
今回は以下の表現をしてみようと思います。
1.水中の深さ表現
2.水面の環境の反射表現
3.水面の光反射表現
4.水中の屈折表現
5.波の境界表現
水中の深さ表現
こちらは5つの中でも一番簡単です。
高さフォグというものを使用します。
こちら、水面にかけるシェーダーではなく地形の方にかけるシェーダーです。
こちらは簡単に作成できます。
float fogFactor = saturate(input.positionWS.y - _MinHeight);
finalColor = lerp(_FogColor, finalColor, fogFactor);
あらかじめ設定した高さと比べその高さ以下ならフォグの色にする。
これをするだけです。
前回のこの記事のTerrainMeshを使用して作成してみました。
パーリンノイズを用いてスクリプトでフラクタル地形メッシュを作成してみた
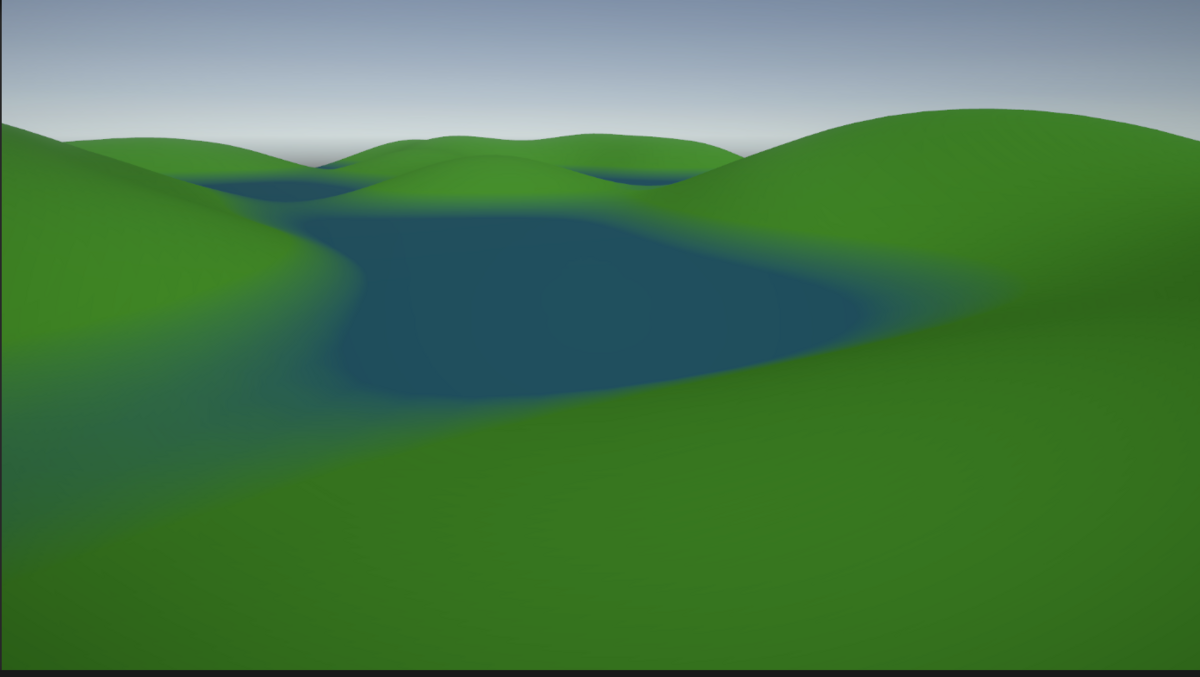
これで深い水底の表現が作れました。(谷表現などでも使えそうですね)
水面の環境の反射表現
こちらはCubemapを使って作ろうと思います。
はて、デザイナーでもない僕らがどうやってそんなもの用意するのか?
実はRefrectionProbeを用いたらリアルタイムに作成するのも、事前に画像に出力することも簡単にできます。
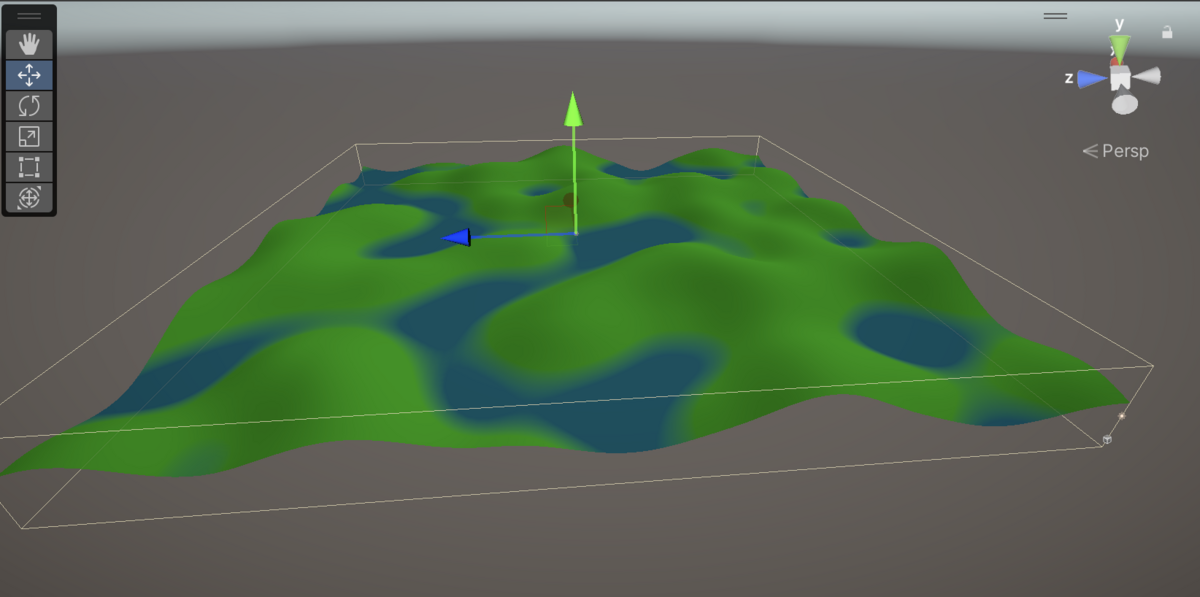
まずはTerrainをstaticにします。
RefrectionProbeが出力するCubemapにはstaticなものしか写りません。
そしてRefrectionProbeをシーンに配置します。
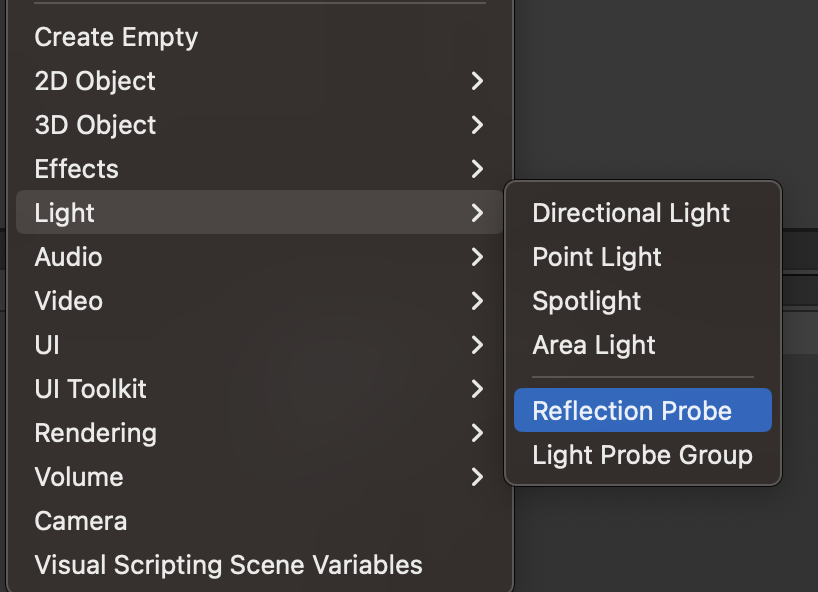
スケールやポジションを変更し、地形全体が囲まれるように設定します。
最後にRefrectionProbeコンポーネント内にあるBakeを押すだけです。
そしたらこのような画像がシーンのフォルダ付近にできると思います。

これをシェーダーで使用して反射を作っていこうと思います。
real4 _SpecularCubemap_HDR;
TEXTURECUBE(_SpecularCubemap);
SAMPLER(sampler_SpecularCubemap);
CubeMapはこのようにTEXTURECUBE()で囲むようです。
サンプリングはこのようになります。
// 反射を作成
float3 viewDir = normalize(_WorldSpaceCameraPos - input.positionWS); //視線ベクトルを計算
float3 refDir = reflect(-viewDir, normal); //反射ベクトルを計算
float3 refColor = SAMPLE_TEXTURECUBE_LOD(_SpecularCubemap, sampler_SpecularCubemap, refDir, 1);
視線ベクトルから反射ベクトルを作成し、それを用いてサンプリングするようです。
1と書いてるのはmipmaplevelです。
ぼかしたければ高い値を入れるとボケた反射テクスチャが取得できます。
これで反射することができました。
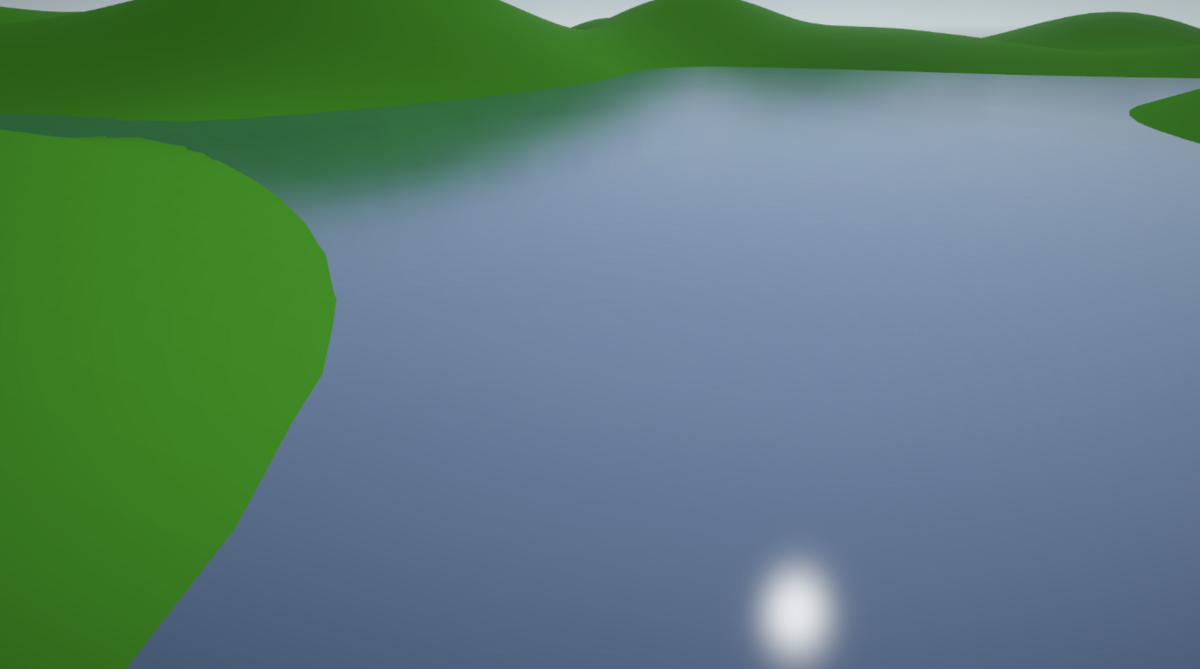
水面の光反射表現
よく水面がキラキラしてる場面写がドラマやアニメで使われていると思います。
今回はそれになるべく近づけたらいいなと思います。
どうやって表現するかというとheightマップを使います。
これで波の表面を荒立たせ、スペキュラをキラキラにしようと思います。
以下がNormalの生成コードです。
float height = FMB2(input.uv * 400 + _Time.x * 30, 3);
float3 normal = cross(
float3(0,ddy(height),1),
float3(1,ddx(height),0));
このFMB2は非整数ブラウン運動というノイズ生成アルゴリズムです。
Unityは用意してないのですが、検索すれば沢山出てくると思います。
float3 normal = cross(
float3(0,ddy(height),1),
float3(1,ddx(height),0));
こちらの箇所はこの記事を参考にして作成しました。
【Unity , shader】原神の海を再現したい
隣接したピクセルの値の勾配を取得し外積を取ると法線情報が取得できるようです。
これを用いたらこのようになりました。
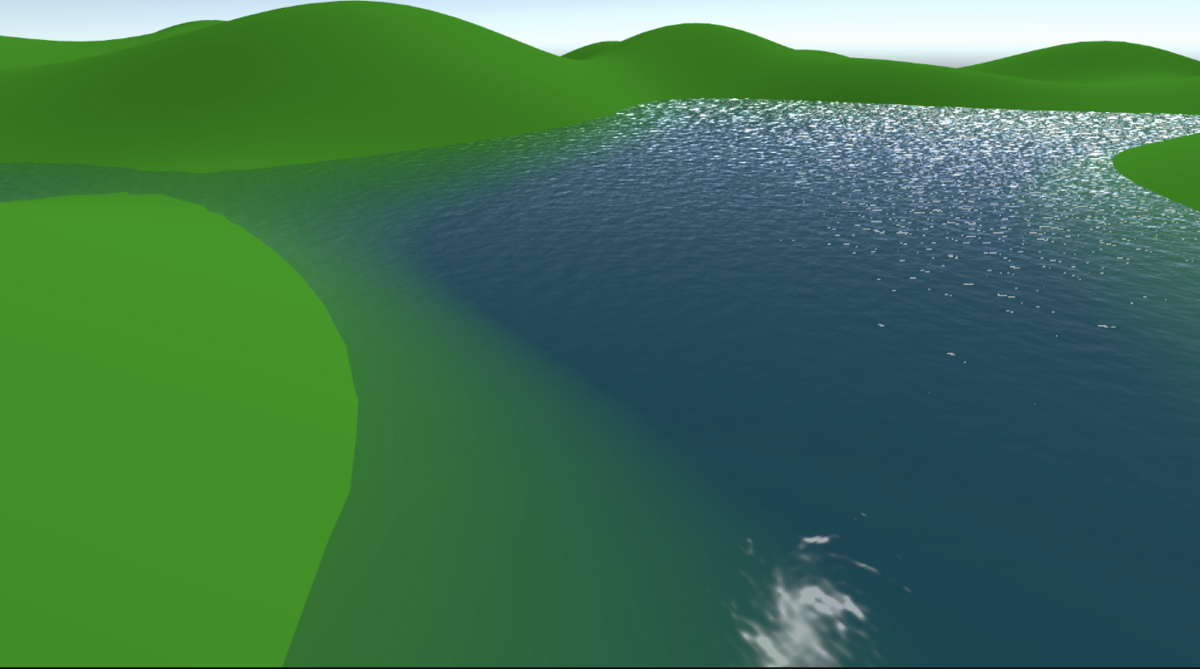
水中の屈折表現
水中表現を作成します。
ディストーションのような表現を行いたいので水中の画像をキャプチャするところから始めようと思います。
URPにはOpaqueTextureなるものがあるのですが、今回は勉強の意味も込め自分でGrabPassを作ってみました。
RendererFeatureは以下の通りです。
using UnityEngine;
using UnityEngine.Rendering;
using UnityEngine.Rendering.Universal;

public class GrabPassRendererFeature : ScriptableRendererFeature
{
    [SerializeField] private RenderPassEvent _renderPassEvent = RenderPassEvent.AfterRenderingOpaques;

    private readonly string _grabPassTextureName = "_GrabPassTexture";

    private RTHandle _grabPassTexture;

    private GrabPassRenderPass _renderPass;


    public override void Create()
    {
        _renderPass = new GrabPassRenderPass();
    }

    public override void AddRenderPasses(ScriptableRenderer renderer, ref RenderingData renderingData)
    {
        renderer.EnqueuePass(_renderPass);
    }

    public override void SetupRenderPasses(ScriptableRenderer renderer,
        in RenderingData renderingData)
    {
        _renderPass.renderPassEvent = _renderPassEvent;

        var desc = renderingData.cameraData.cameraTargetDescriptor;
        desc.depthBufferBits = 0;
        RenderingUtils.ReAllocateIfNeeded(ref _grabPassTexture, desc, FilterMode.Point, TextureWrapMode.Clamp,
            name: _grabPassTextureName);

        _renderPass.Setup(_grabPassTexture);
    }

    protected override void Dispose(bool disposing)
    {
        base.Dispose(disposing);
        _grabPassTexture?.Release();
    }
}
var desc = renderingData.cameraData.cameraTargetDescriptor;
desc.depthBufferBits = 0;
RenderingUtils.ReAllocateIfNeeded(ref _grabPassTexture, desc, FilterMode.Point, TextureWrapMode.Clamp, name: _grabPassTextureName);
こんな感じでURP14ではRTHandleを使用し、RenderingUtils.ReAllocateIfNeededで確保するようです。
使い終わったらRelease()も忘れずに行いましょう。
RenderPassはこのようになります。
using UnityEngine;
using UnityEngine.Rendering;
using UnityEngine.Rendering.Universal;

public class GrabPassRenderPass : ScriptableRenderPass
{
    static readonly int _grabPassTextureProperty = Shader.PropertyToID("_GrabPassTexture");

    private RTHandle _grabPassTexture;

    private RTHandle _source;

    public void Setup(RTHandle grabPassTexture)
    {
        _grabPassTexture = grabPassTexture;
    }

    public override void OnCameraSetup(CommandBuffer cmd, ref RenderingData renderingData)
    {
        CameraData cameraData = renderingData.cameraData;
        _source = cameraData.renderer.cameraColorTargetHandle;

        cmd.SetGlobalTexture(_grabPassTextureProperty, _grabPassTexture);
    }

    public override void OnCameraCleanup(CommandBuffer cmd)
    {
        _grabPassTexture = null;
        _source = null;
    }

    public override void Execute(ScriptableRenderContext context, ref RenderingData renderingData)
    {
        if (_source == null || string.IsNullOrEmpty(_source.name))
        {
            return;
        }

        CommandBuffer cmd = CommandBufferPool.Get();
        using (new ProfilingScope(cmd, new ProfilingSampler("GrabPass")))
        {
            Blitter.BlitCameraTexture(cmd, _source, _grabPassTexture);
        }

        Blitter.BlitCameraTexture(cmd, _source, _grabPassTexture);

        context.ExecuteCommandBuffer(cmd);
        CommandBufferPool.Release(cmd);
    }
}
cmd.SetGlobalTexture(_grabPassTextureProperty, _grabPassTexture);
この箇所でシェーダーのグローバルプロパティにテクスチャをセットします。
Blitter.BlitCameraTexture(cmd, _source, _grabPassTexture);
URP14ではBlitter.BlitCameraTextureでレンダーテクスチャのコピーができるようです。
また以下のようにnulチェックをしないとエラーログが出ます。
nullになってしまうフレームがあるようです。
if (_source == null || string.IsNullOrEmpty(_source.name))
{
    return;
}
これでGrabPassが追加できました。
これを用いて水面を表示しましょう。
今までは半透明でしたが、このテクスチャを用いるので不透明で半透明の役割が出せます。
TEXTURE2D(_GrabPassTexture);
SAMPLER(sampler_GrabPassTexture);
float4 _GrabPassTexture_ST;
RenderPassでセットしたグローバルプロパティを取得します。
次にテクスチャのサンプルですが、少し工夫しないといけません。
なぜならuvがこのままだと_GrabPassTextureと異なってしまうからです。
この場合UVはスクリーンスペースに変換する必要があります。
// スクリーンスペースにUVを変換
float2 ScreenSpaceUV = input.positionHCS.xy / _ScreenParams.xy;
float4 insideColor = SAMPLE_TEXTURE2D(_GrabPassTexture, sampler_GrabPassTexture, grabTextureUV);
これで取得できました。
反射率もいじった結果こんな感じになりました。
そしてこのテクスチャを歪ませようと思います。
歪ませること自体は簡単で、UVをずらせばいいだけです。
そのUVをずらすかどうかは深度値を参照します。
深度値を比べる方法は以下の通りです。
float4 depthTexture = SAMPLE_TEXTURE2D(_CameraDepthTexture, sampler_CameraDepthTexture, ScreenSpaceUV);
float terrainDepthLiner = LinearEyeDepth(depthTexture.r, _ZBufferParams);
float4 proPos = ComputeScreenPos(input.positionHCS);
float currentDepth = proPos.z;
float currentDepthLiner = LinearEyeDepth(currentDepth, _ZBufferParams);

float depthDiff = terrainDepthLiner - currentDepthLiner;
depthDiff = saturate(depthDiff);
float distortion = sin(depthDiff + _Time.w * 2.0f);
distortion *= _DistortionValue;

float2 grabTextureUV = ScreenSpaceUV + distortion;
float4 insideColor = SAMPLE_TEXTURE2D(_GrabPassTexture, sampler_GrabPassTexture, grabTextureUV);
float4 depthTexture = SAMPLE_TEXTURE2D(_CameraDepthTexture, sampler_CameraDepthTexture, ScreenSpaceUV);
float terrainDepthLiner = LinearEyeDepth(depthTexture.r, _ZBufferParams);
こんな感じで地形の深度値を取得します。
_CameraDepthTextureはUnity側が用意してくれているデフォルトの深度値バッファです。
LinearEyeDepthは深度値を線型補完の形にしてくれるUnityが用意してくれている関数です。
書き込む深度値は以下の通りになります。
float4 proPos = ComputeScreenPos(input.positionHCS);
float currentDepth = proPos.z;
float currentDepthLiner = LinearEyeDepth(currentDepth, _ZBufferParams);
これらを以下のように差分を取り、UVにオフセットをかければ歪み表現ができます。
float depthDiff = terrainDepthLiner - currentDepthLiner;
depthDiff = saturate(depthDiff);
float distortion = sin(depthDiff + _Time.w * 2.0f);
distortion *= _DistortionValue;

float2 grabTextureUV = ScreenSpaceUV + distortion;
float4 insideColor = SAMPLE_TEXTURE2D(_GrabPassTexture, sampler_GrabPassTexture, grabTextureUV);
波の境界表現
海岸側だと波が白く泡立っていることがります。
今回はそのような海の境界表現を作ろうと思います。
こちらは水中の屈折表現ができれば簡単にできます。
やることは水と地形の深度値を参照し、差分が少ない箇所を浅瀬と判定すればいいだけです。
float waveOffsetValue = 0.0f;
waveOffsetValue = saturate(waveOffsetValue);
float4 whiteWavesColor = lerp(float4(1.0, 1.0f, 1.0f, 1.0f), finalColor, 0.9f);
whiteWavesColor  = lerp(whiteWavesColor, finalColor,  waveOffsetValue);
depthDiff = step(depthDiff, _WhiteWaveOffset);
finalColor = lerp(finalColor, whiteWavesColor, depthDiff);
白波を作ってる箇所は以下の通りです。
depthDiff = step(depthDiff, _WhiteWaveOffset);
finalColor = lerp(finalColor, whiteWavesColor, depthDiff);
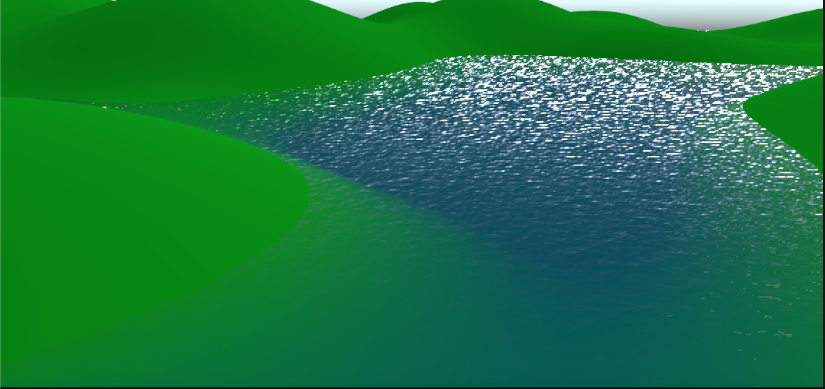
深度値の差分が少ない箇所に色をつけるだけです。
最終的にはこんな感じになります。
最後
白波と屈折表現の箇所をもっと凝りたかったですが、まずはアウトプットをするのが大事ということでこの記事を書かせていただきました。
時間がある時にリベンジしようと思います。
ここまでみていただきありがとうございました。